Program Setup
Welcome!
Don't worry!! This looks like a lot of setting but is mostly a "Set it and Forget it" one time thing. That said, there are a number of different options you can enable/disable to keep the students interested in your program. One common mistake I see is to enable every feature, Virtual Badges, Monkey Money and start a month long contest. From my experience (with elementary school age students) starting a new program with only positive verbal encouragement by reading out their total miles with each scan goes a long way. The Monkey Money option was only created after the second year of daily scanning at one Davis school. Some Davis schools still do not use Monkey Money and they have been scanning daily for over five years now.
The trick is to sprinkle in the Virtual Badges, and Monkey Money only if and when you see a dip in participation/enthusiasm.
As for the parents, enabling all notification types from the beginning is best.
That said every school/program is unique you will know best how to organize and design the program to fit your needs.
Login to Active4.me
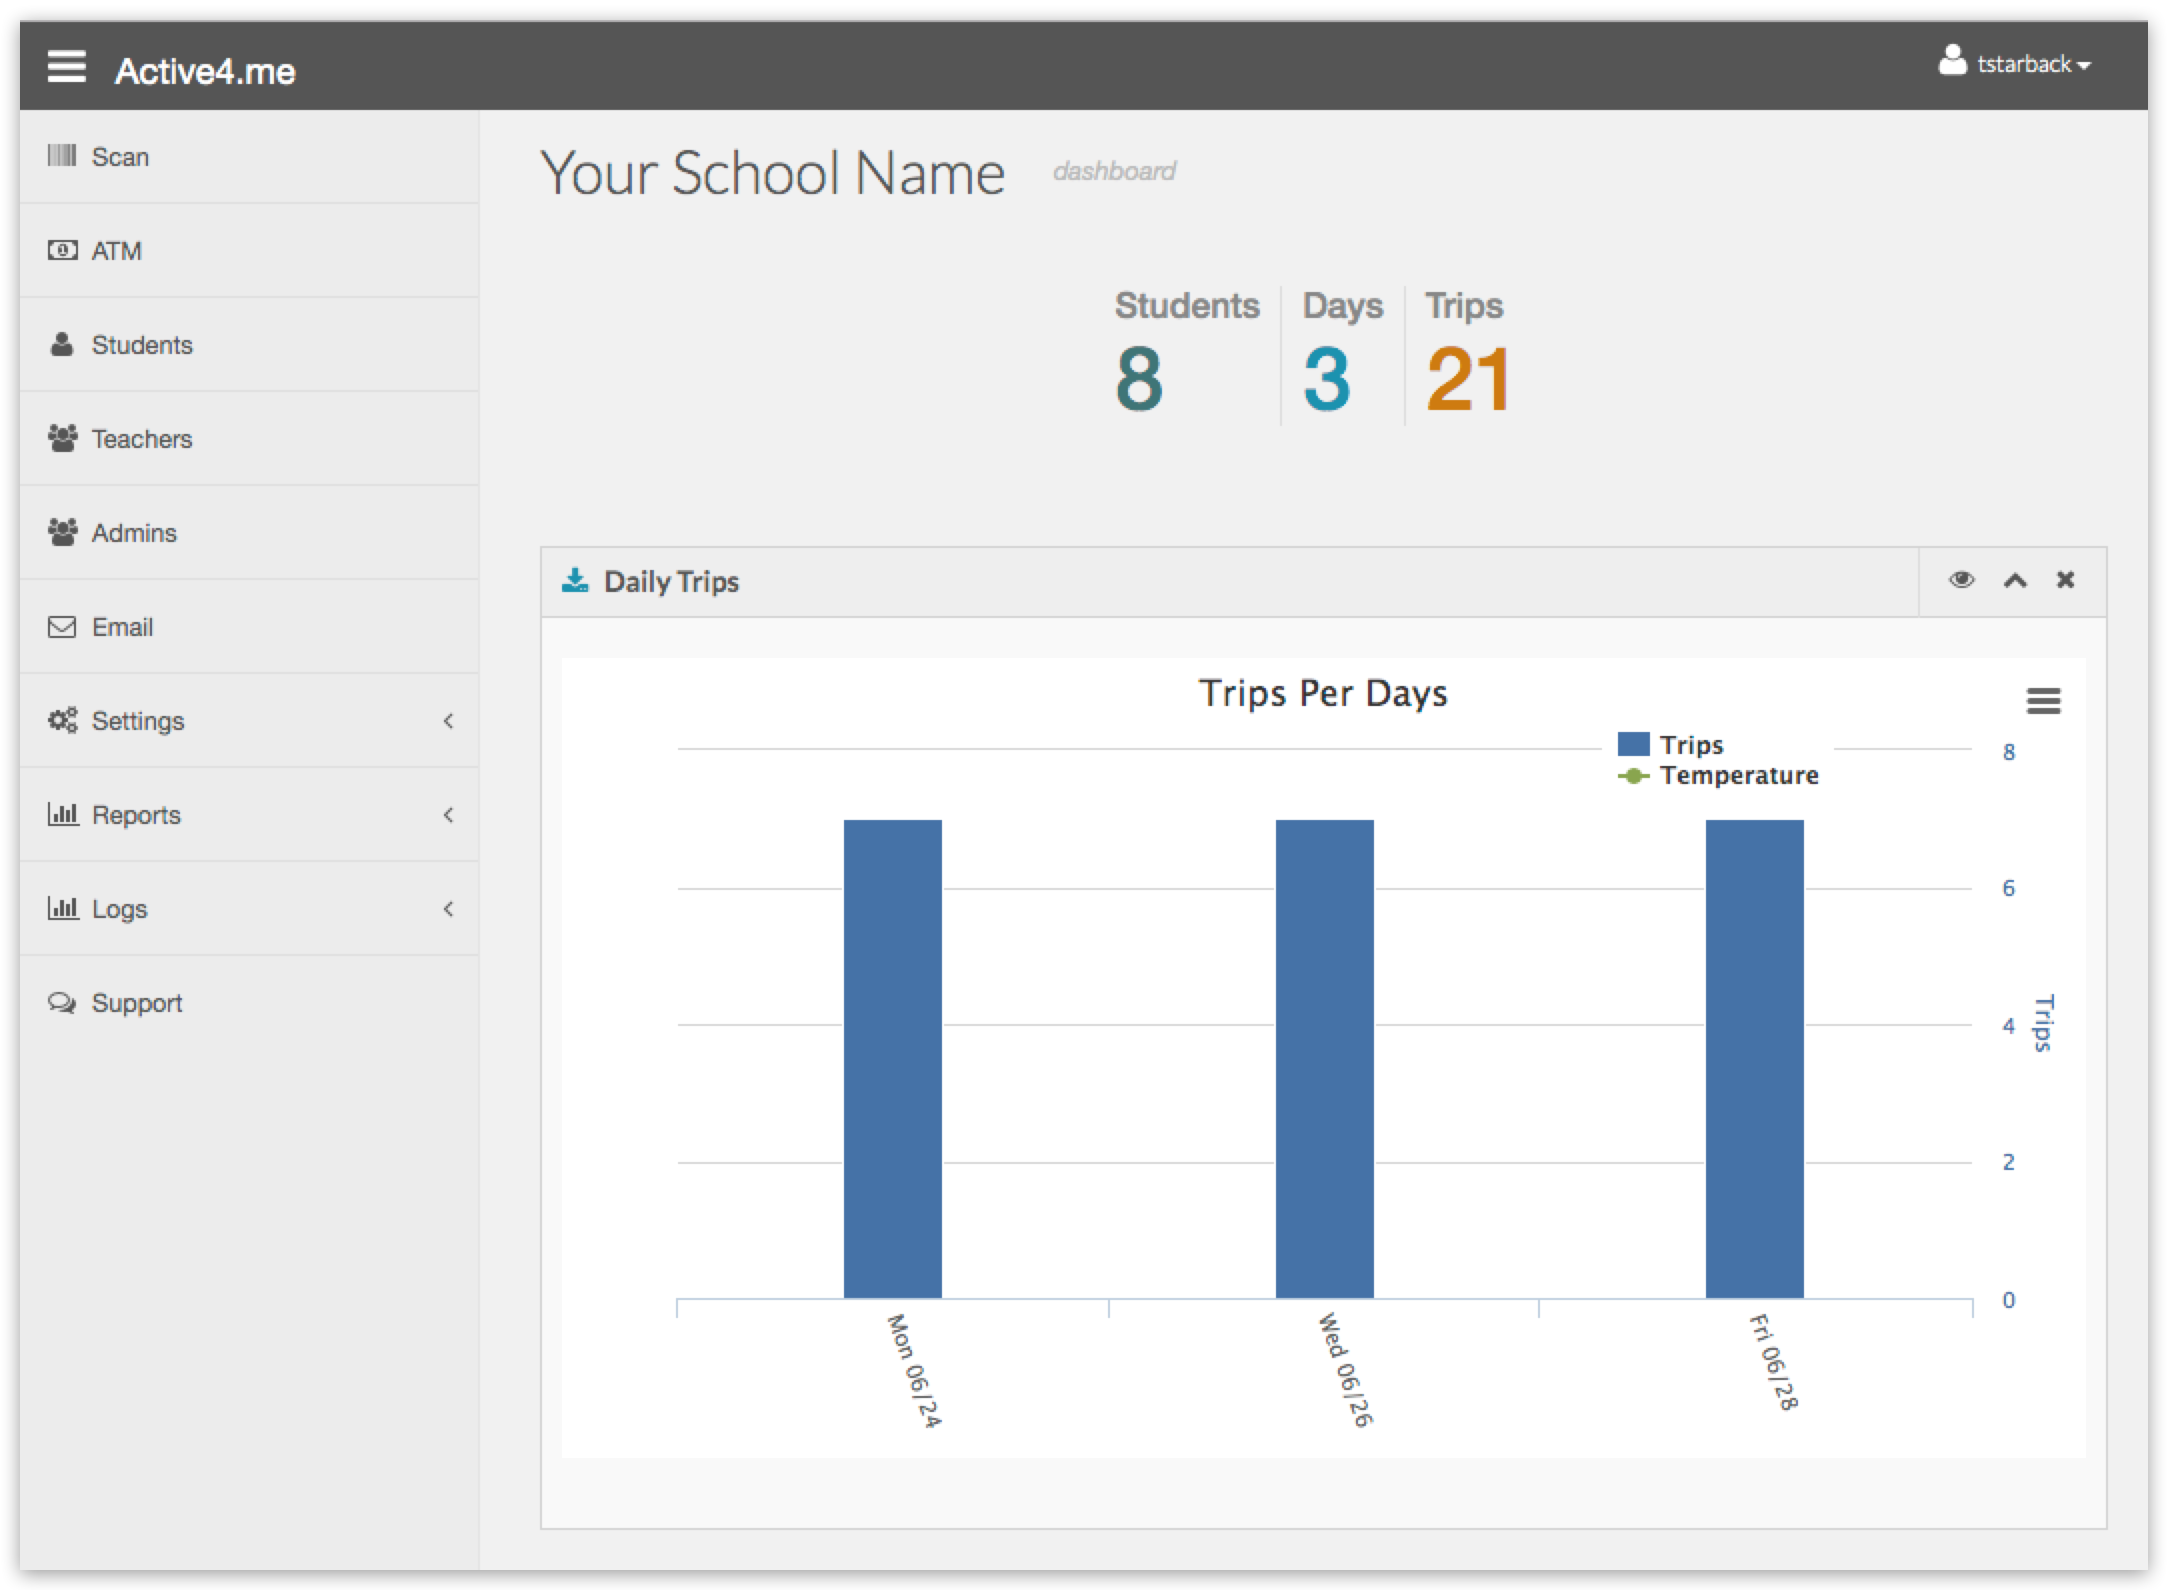
The dashboard is the first page you will see. At the top it shows the number of students, program days and total trips. Below that, the bar chart shows the daily trip counts and the temperate if you have enabled it. This chart data uses the Program Start and Program End dates entered in Settings >> General >> (Start Date/End Date).

Under the Daily Trips bar chart it shows the account expiration date, number of days remaining, maximum number of student, remaining notification credits and a list of receipts/invoices.
This is where you can renew your account, add notification credits or create an invoice.
Setting Up Your Program
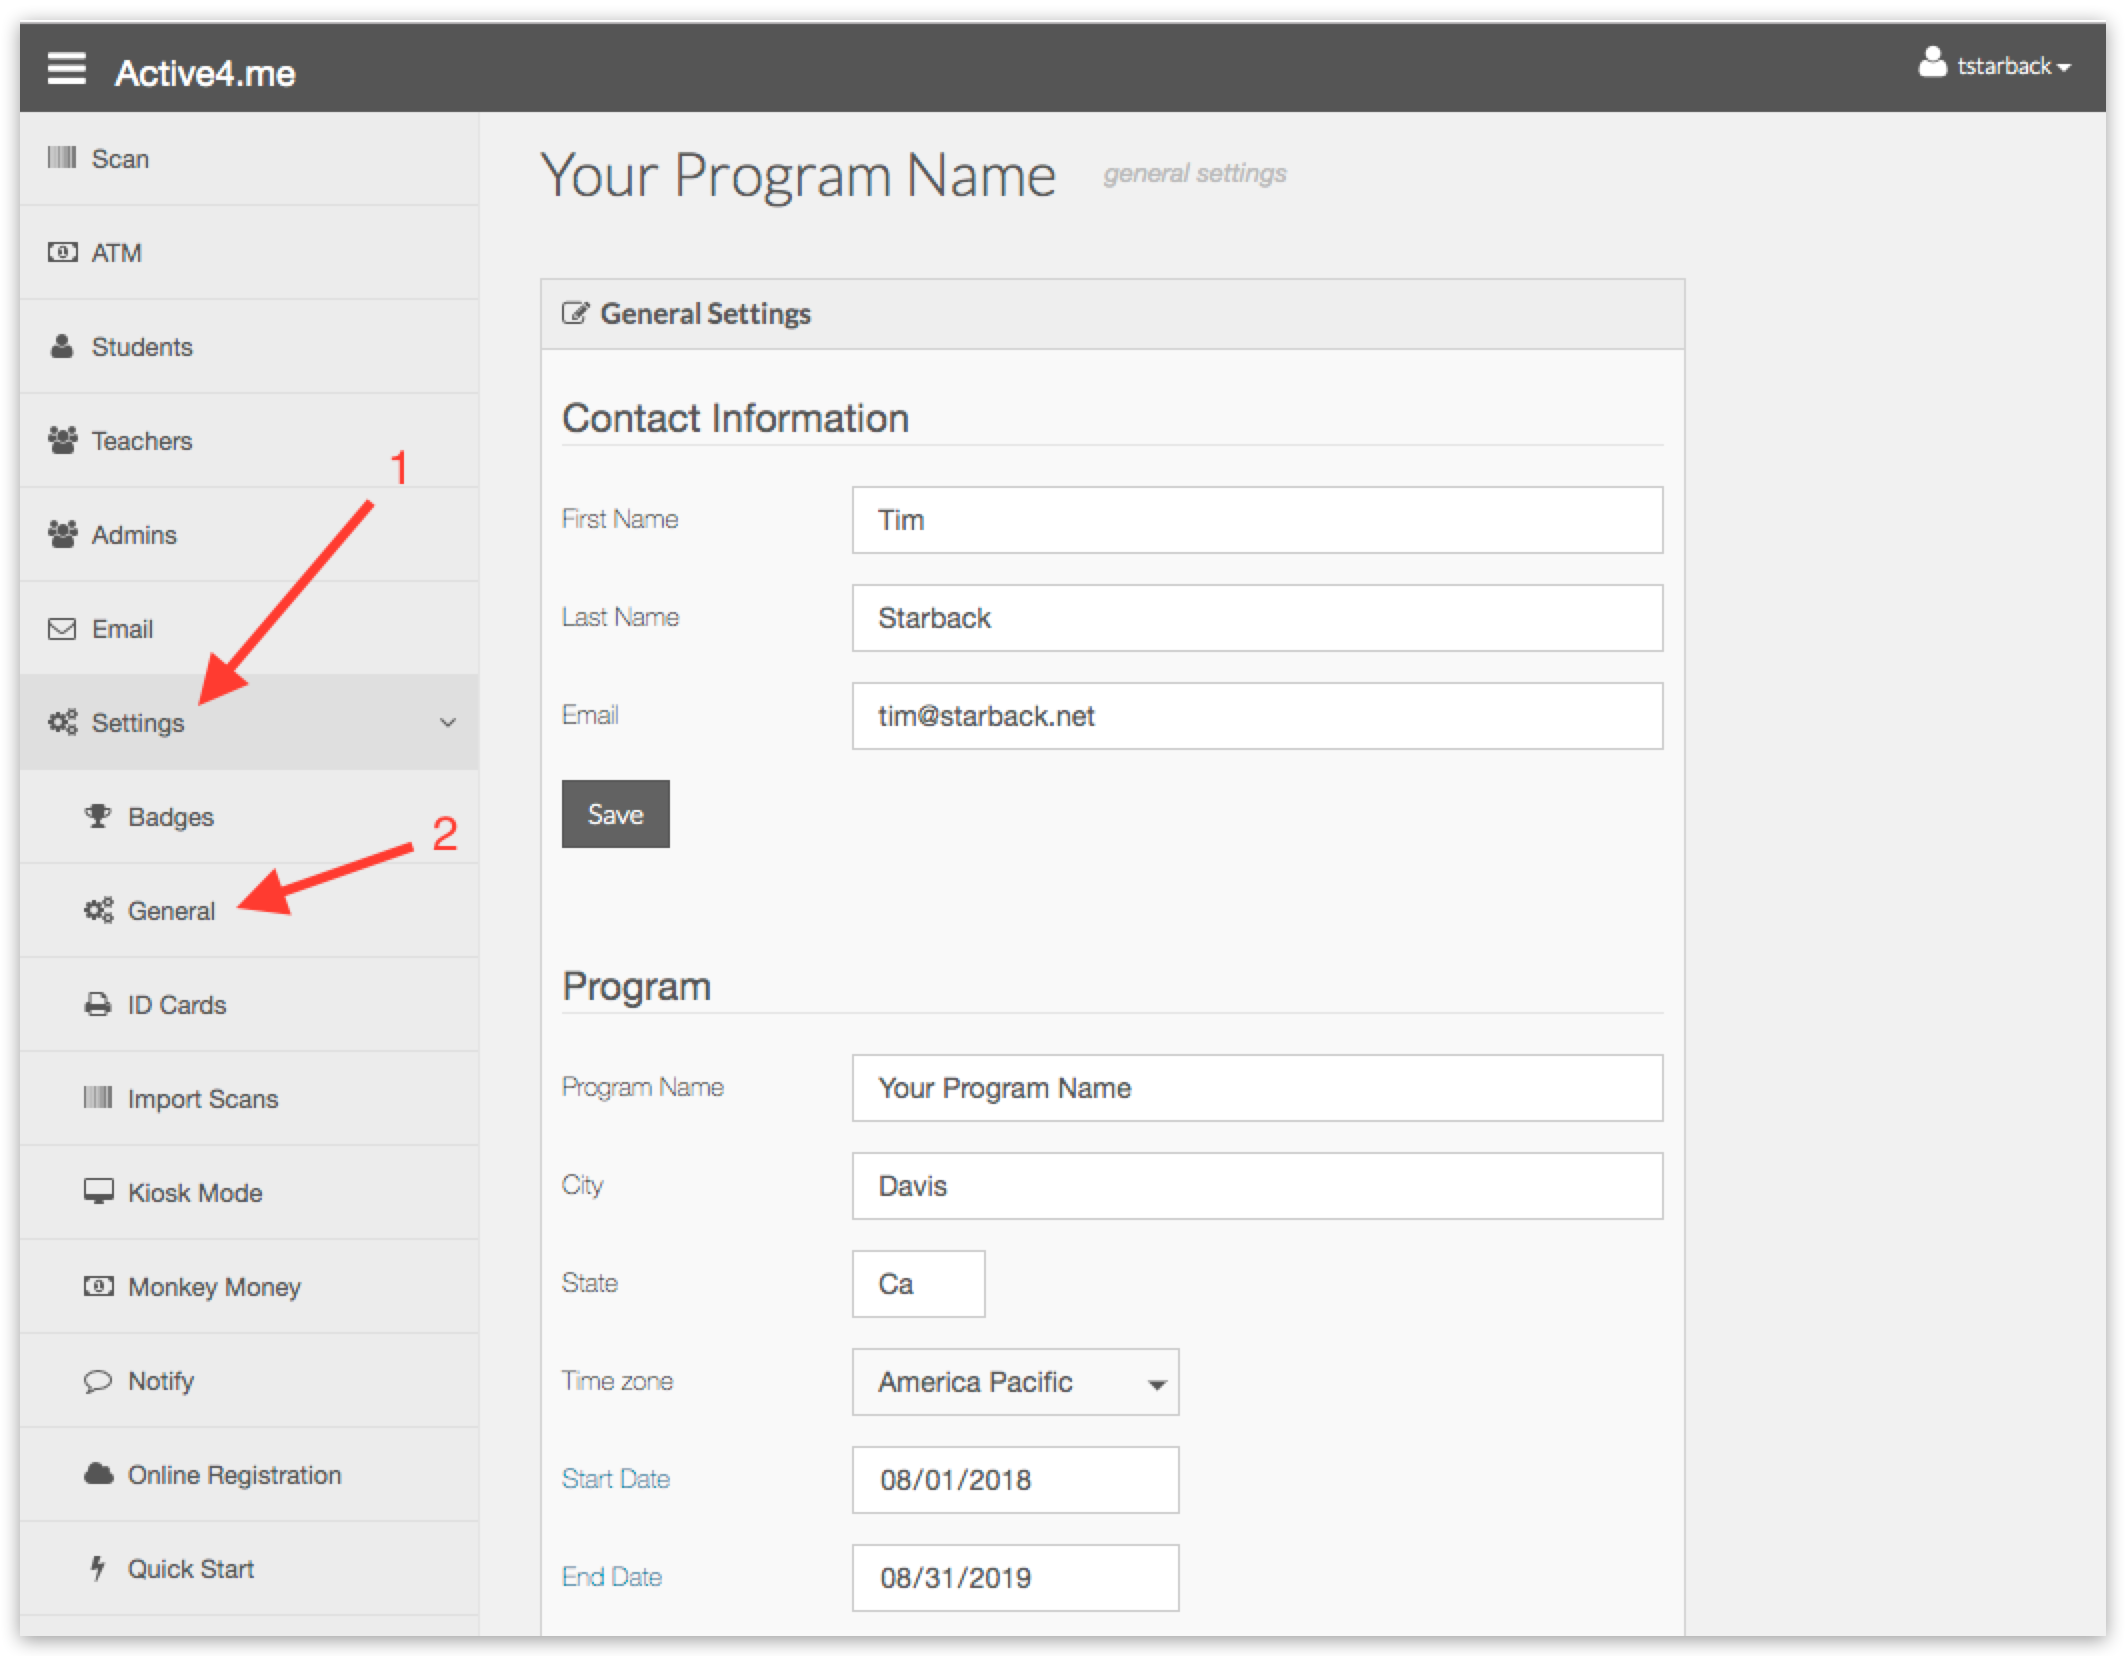
1. Click Settings in the side bar menu.
2. Click General in expanded side bar menu.
Contact Information
This is the main site contact for your program. This is the contact/email that will receive alerts/notifications and reminders about account renewals.
Program
Program Name: Your program/school name
City, State: We use this for the weather lookup and to help parents find your program by city.
Time Zone: Select your timezone to enable accurate notify window notifications.
Start Date: This is the beginning date we use to show all stats and award virtual badges.
End Date: This is the end date we use to show all stats and award virtual badges.
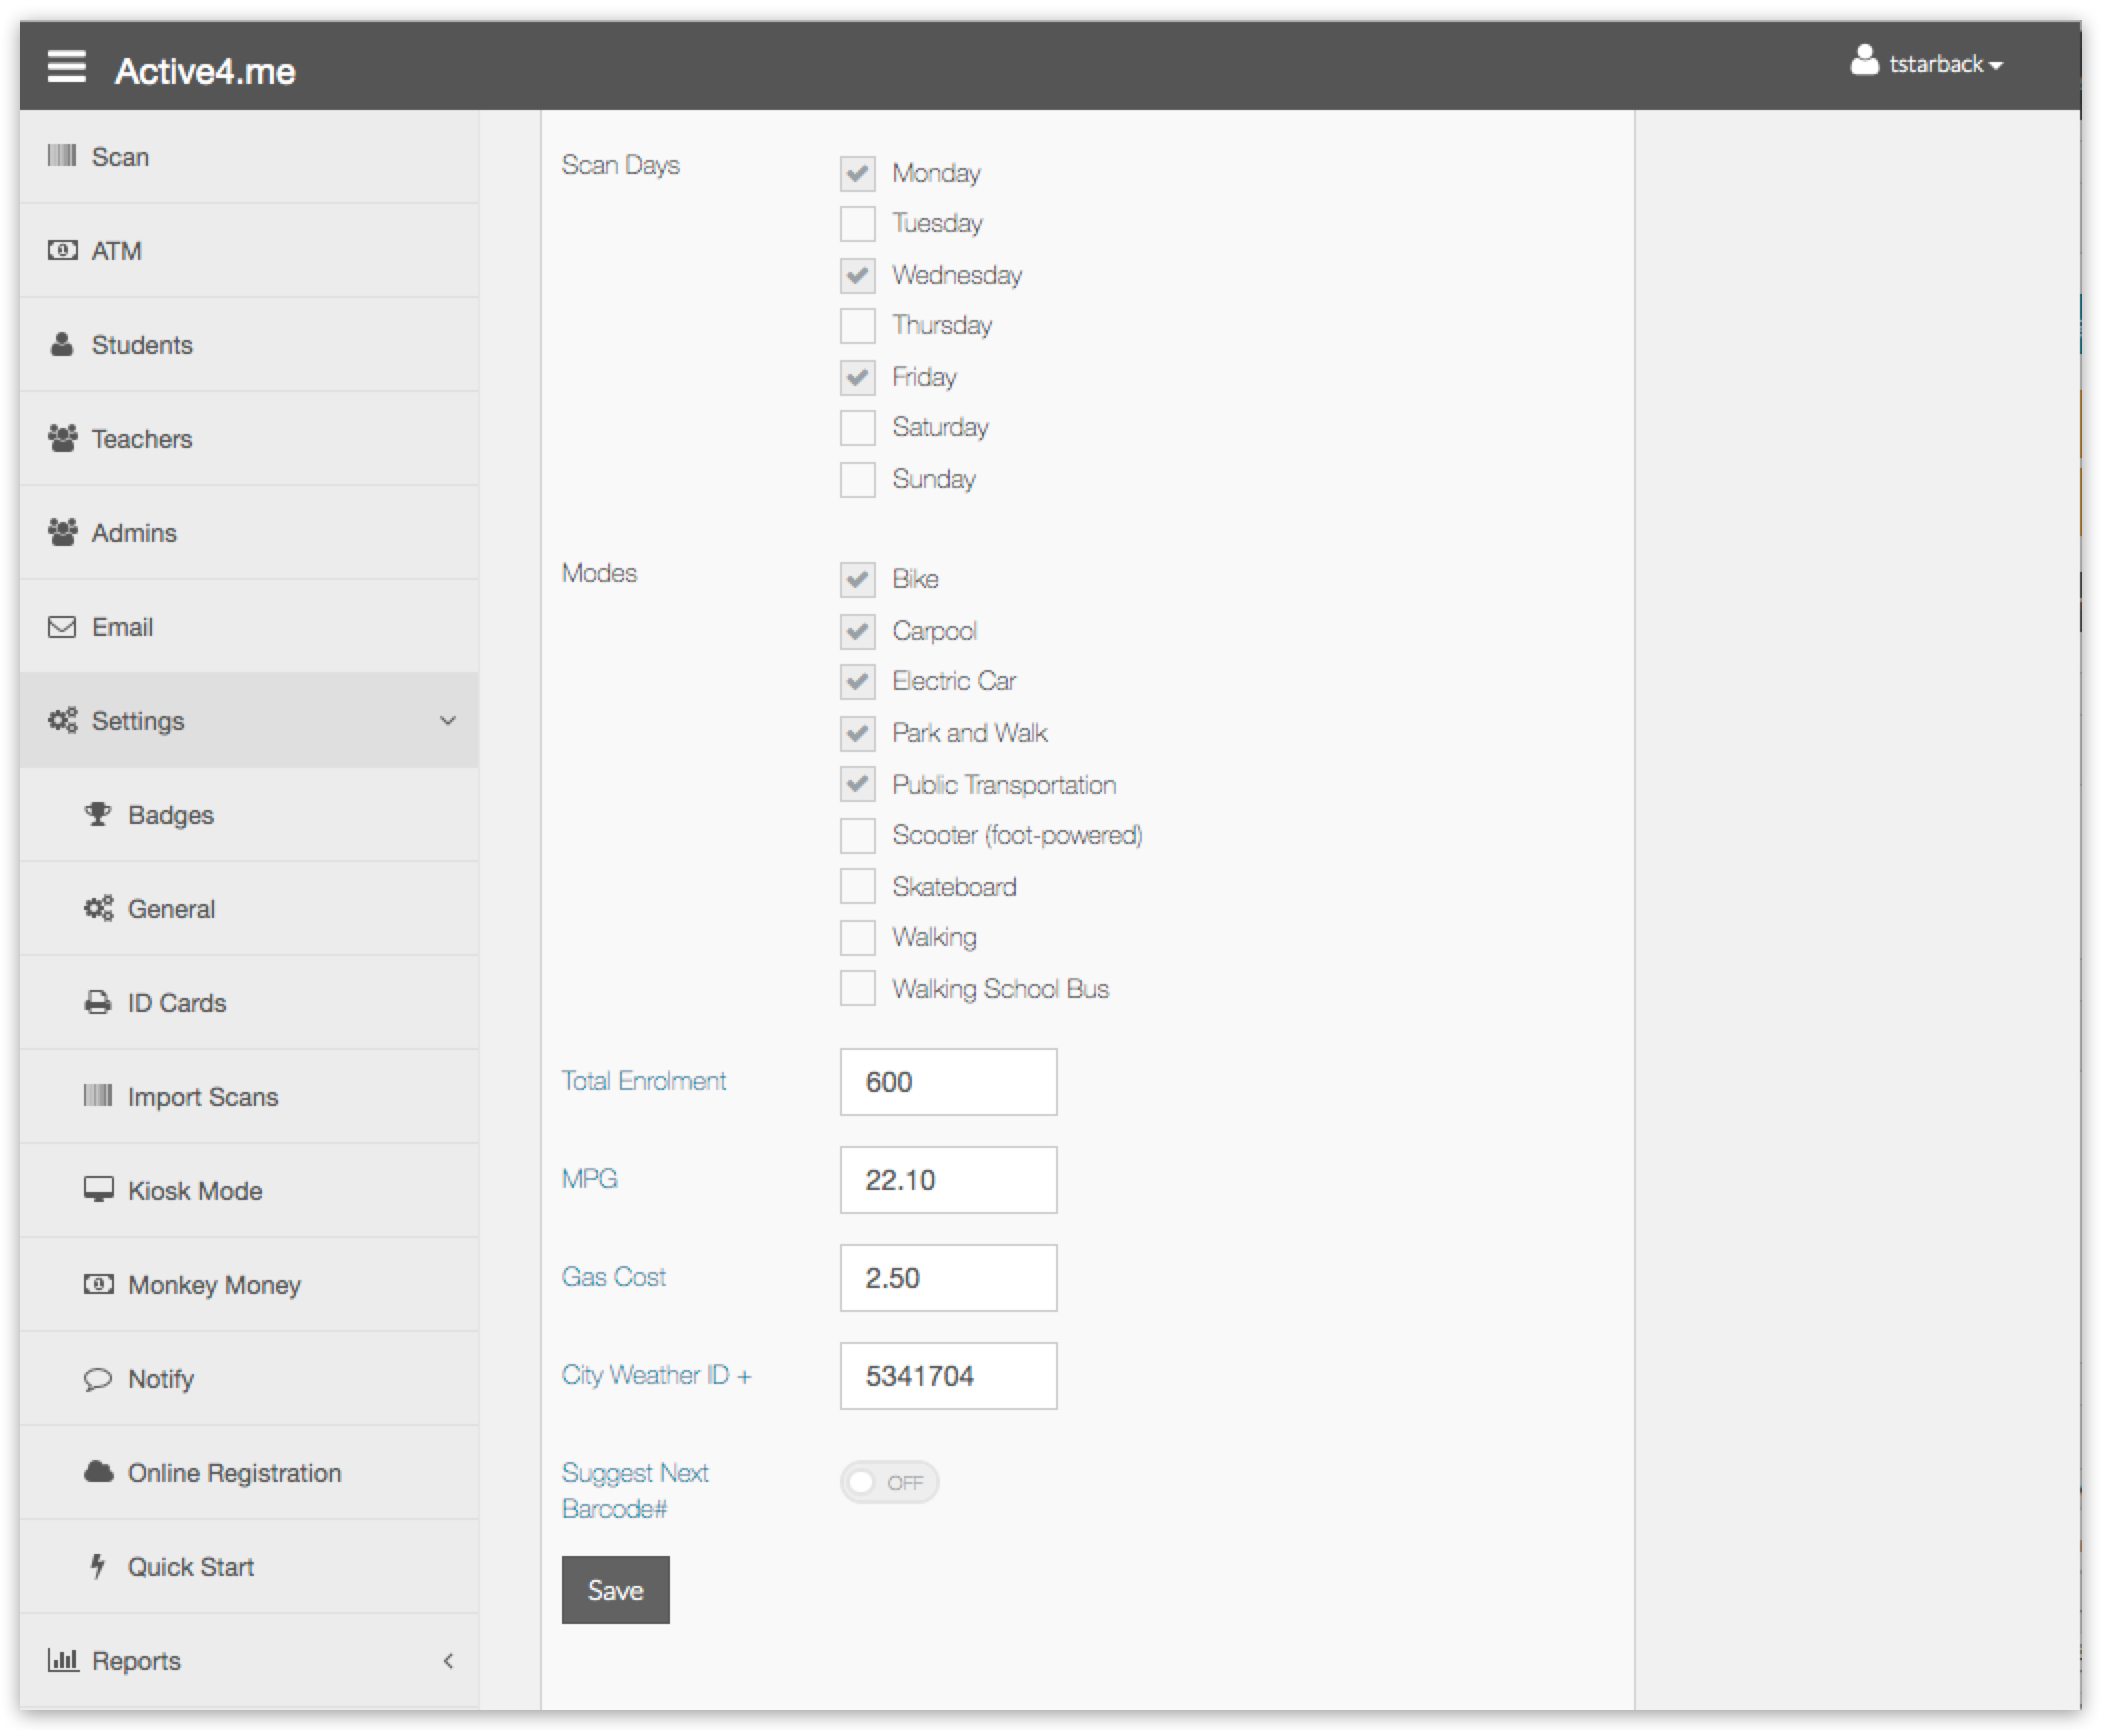
Scan Days: Check any days you want to enable scanning.
Mode: Check any transportation modes your program allows.
Total Enrollment: Total enrollment at your school. We use this number to calculate percentages of participation.
Suggest Next Barcode #: For new student records the system will insert a new unique number.
Click the Save button!
Notify Settings
This is where you will enable the type of parental notifications (email, text, phone), the maximum number of emails and text/phone notifications per student account, and the type of feedback that is displayed with each notification. Notify Windows enable you to set specific times when scanning is available and if there is a custom message that should be included with the notification. It's very important to be sure you have selected your timezone found in Settings >> General >> Timezone. If not selected the default timezone is America Pacific.
As an example, with these settings your Monday, Wednesday, Friday morning checkin program has enabled all Notify Types (email, text, phone) and has limited each student record to no more than two emails and two text/phone notifications. We've also added a second Notify Window for the afternoon to allow for a second scan after school with it's own custom message.
It's important to note that even if you disable all notification types you will still need to add at least one Notify Window to enable scanning.
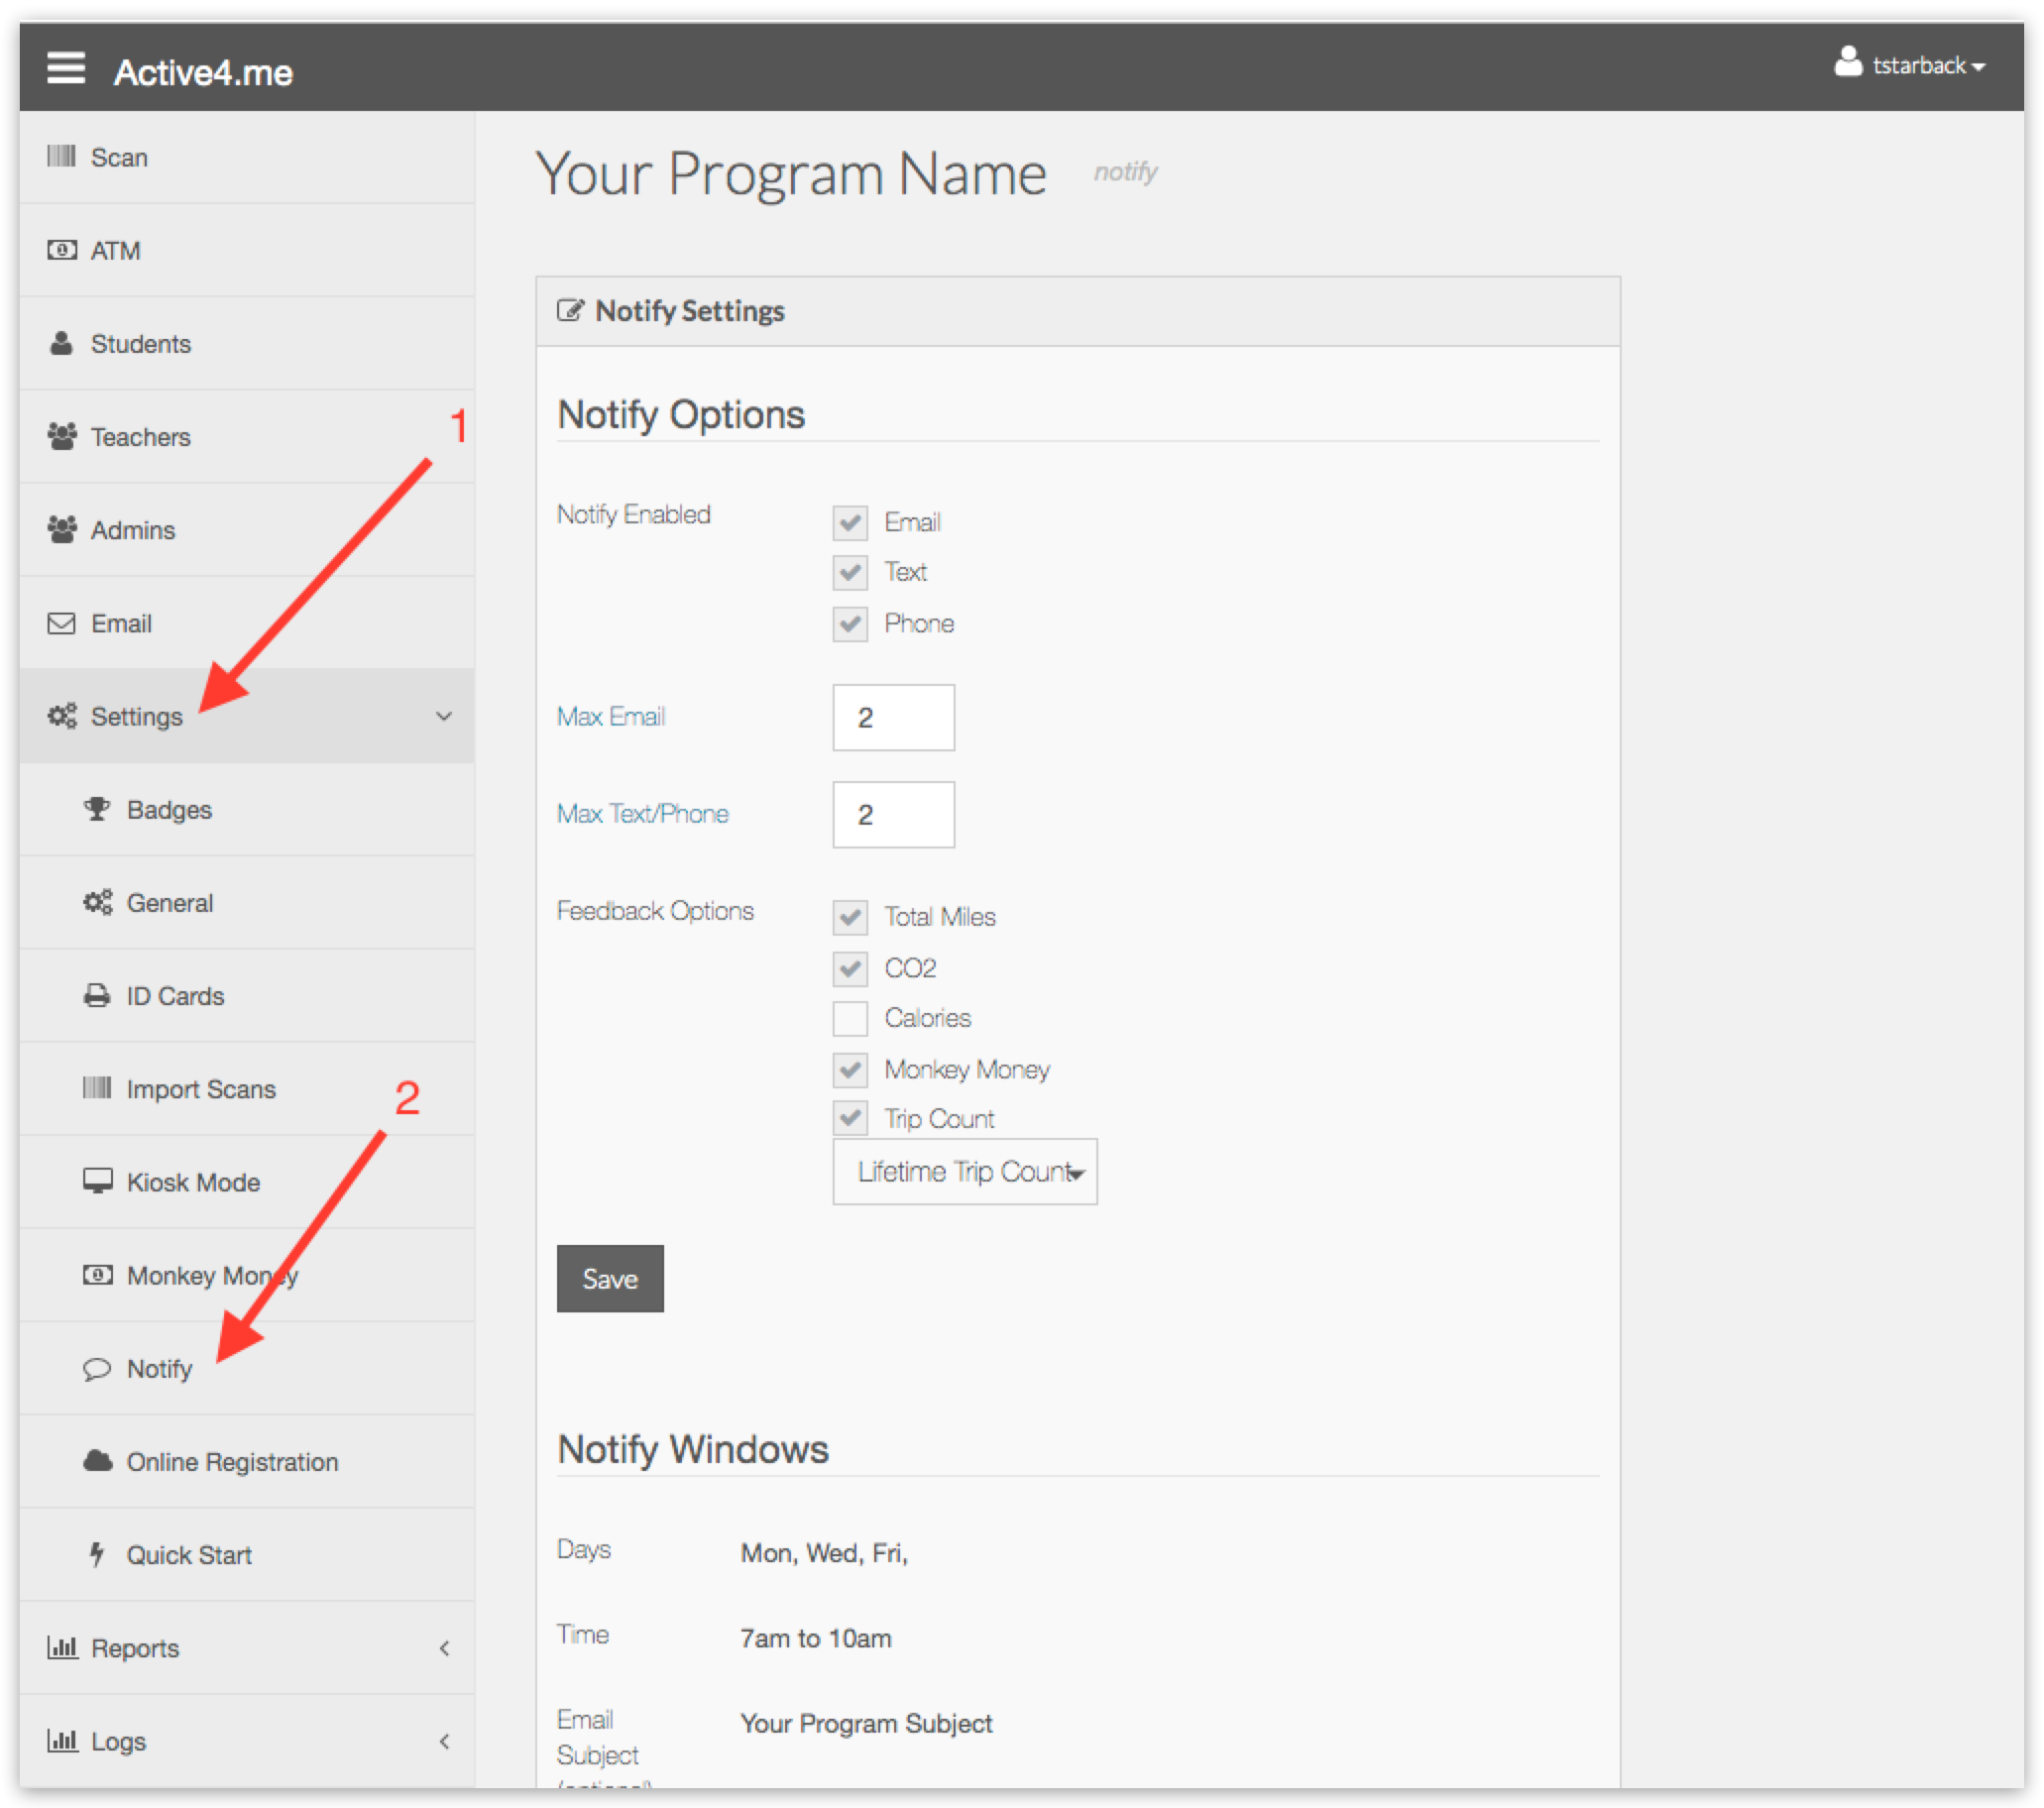
1. Click on Settings in the side bar menu.
2. Click on Notify in the expanded side bar menu.
Notify Enabled: Check each item that your program will allow.
Max Email: This is the maximum number of email notifications each student account will allow.
Max Text/Phone: This is the maximum number of text/phone notifications each student account will allow.
Feedback Options: These are the student specific totals sent back to the app and included in each notification. There is a maximum number of four items that can be selected. Trip counts need to specify which count (Contest, School Year, Lifetime).
If you made any changes click the Save button.
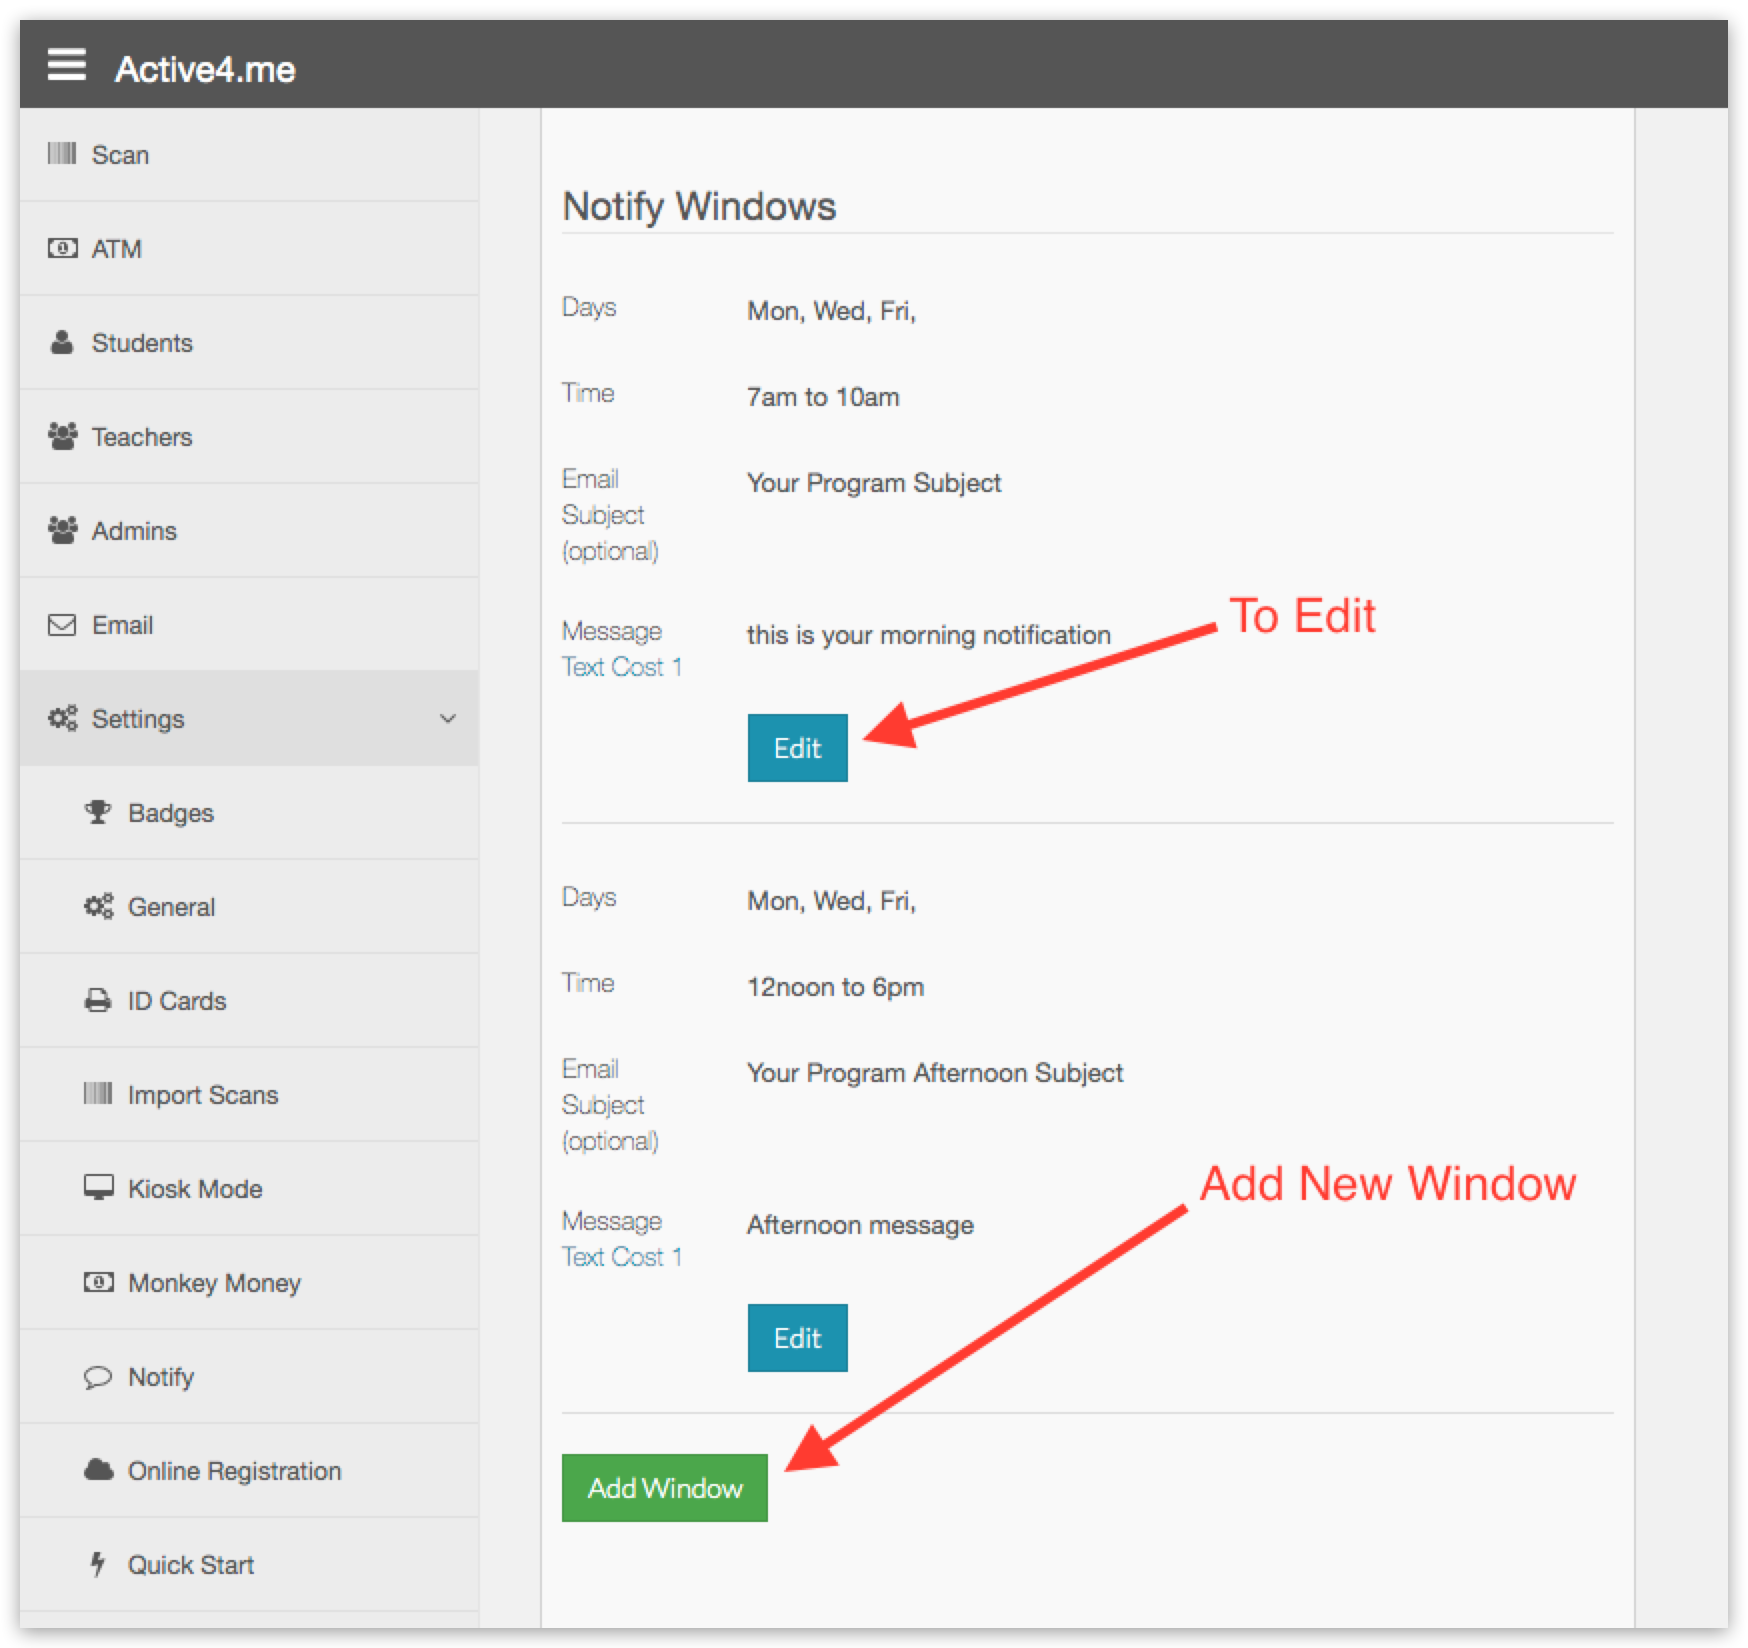
Notify Windows
Each program needs at least one of these to enable scanning.
To and a new Window click the green Add Window button at the bottom.
To delete any Window click Edit then the red Delete button.
Click the Edit button.
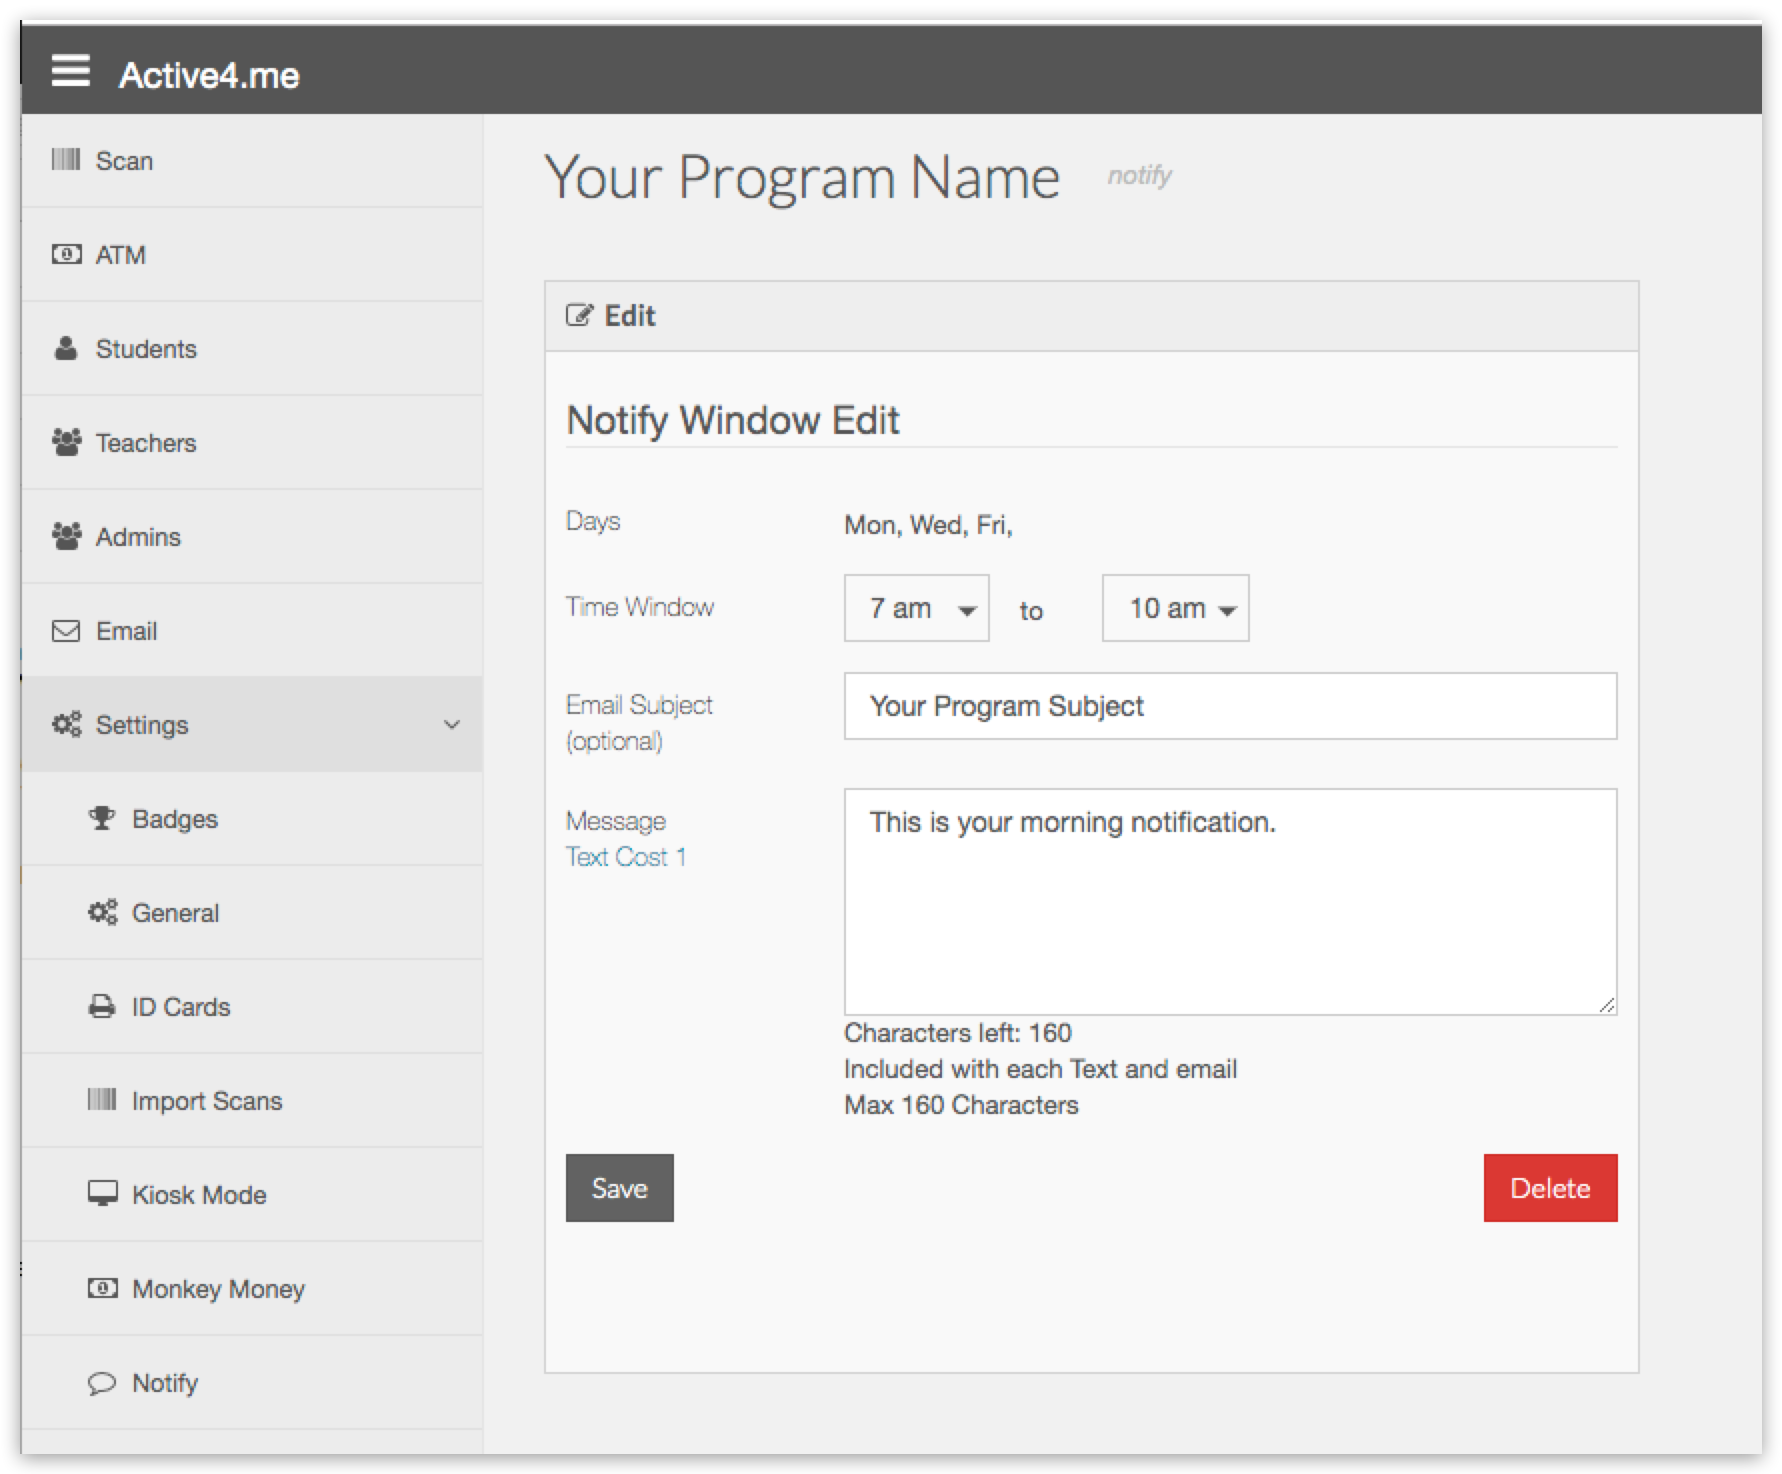
Days: These are set in the Settings >> General >> Scan Days
Time Window: The hours in your local time zone that a scan is allowed. You can set your timezone here: Settings >> General >> Timezone
Email Subject (optional): If you are sending email notifications it will use this as the subject rather than the default subject of "Active4.me Barcode Scan Confirmation". Appended to every email is the name of the day, month and date as an example: Active4.me Barcode Scan Confirmation Fri Jul 5th
Message (optional): This additional text is included with every email and text message. Because of the way text messages are sent, if you add additional text here it might increase the cost to send each message. For more info on that see Text Cost.
Click the Save button if you made any changes.
Add Teachers
Before you can enable the online registration or add students you will need to add your list of teachers.
If you are sending us a list of students to import you can skip this step.
See: https://www.active4.me/Support/Teachers
Add Students
We can import a list of students and teachers for you if you use our import template.
You can enter them manual in the system:
See: https://www.active4.me/Support/AddStudents
You can use the online registration.
See: https://www.active4.me/Support/OnlineRegistration
Add Virtual Badges
It's a good idea to establish your long term goals for this before your program starts.
See: https://www.active4.me/Support/VirtualBadges
Add Monkey Money
See: https://www.active4.me/Support/MonkeyMoney
Reports
See: https://www.active4.me/Support/Reports
Export Data
See: https://www.active4.me/Support/ExportData